
(Flowers in a dim bathroom with indirect natural light from one window. Unedited, shot in manual. I can't believe I took this!)
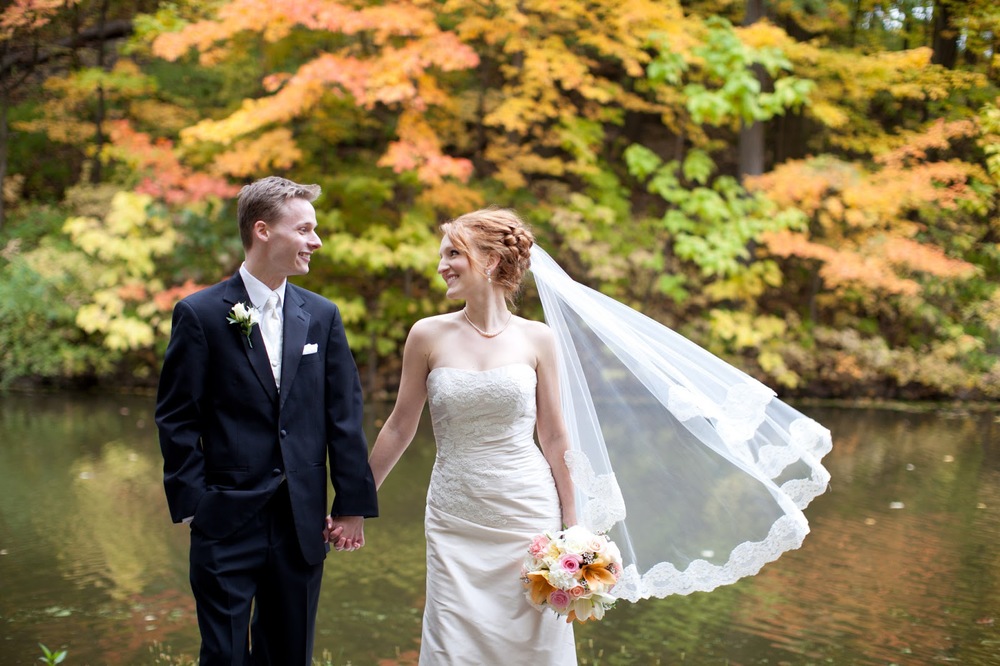
Since moving to Chicago last August, I knew that as soon as I upgraded to a DSLR camera I would want to take a photography workshop with our talented and amazing wedding photographer Christy Tyler.
I'd been using my little Canon 7.1 megapixel Power Shot Digital Elph since 2008. While I HIGHLY recommend Power Shots if you're looking for a point and shoot (see great examples here, here, and here--its strengths are landscape shots in natural daylight), I was dying to get a "real camera" to expand my skills, although I figured it would take me another year or two to actually save up for one. Well, Ben surprised me with a Canon Rebel T3 on the morning after our wedding and let's just say that gift cemented the entire weekend as the best weekend ever!
So last Saturday I attended Christy's beginners photography workshop and in just 4 hours she'd taken us all from photography novices to shooting in manual! I'd been playing around with the semi-automatic settings (mainly Av and P) and had basically figured out depth of field, white balance, and exposure while taking millions of self portraits for my Etsy listings, but now I feel like I've unlocked a whole new level of control! With the manual setting it's easier to take the picture you want to capture, as opposed to taking a so-so shot and then editing the heck out of it (and sometimes losing detail) to make it brighter and clearer. It's also easy to take bright photos in dim, indoor settings!
Here is an extremely brief and abbrieviated summary of what I learned:
When you're in manual, the three main things you have to think about are aperture, ISO, and shutter speed.
- You set the aperture (depth of field or f/number) depending on how blurry you want the background to be. If you want to capture one object in focus with a blurry background, set a smaller f/number. If you want a landscape or group shot, set it higher.
- The ISO controls the camera's light sensitivity. A lower ISO number is good for daylight and outdoor shots, and a higher ISO number is necessary for indoor shots or night time.
- The shutter speed controls how much light enters the lens. A slower shutter speed makes your image brighter, and a faster shutter speed makes the image darker but allows you to shoot moving objects.
Now I'll devote the rest of the post to some of the photos I took during the workshop! I'll label them with the aperture (f/no.), ISO, and shutter speed I used for each one so you can see the difference it makes to have the correct settings to achieve the exposure or brightness level you want.
*All of the photos in this entire post were shot in manual and are unedited, straight from the camera! (Canon EOS Rebel T3 with basic kit 18-55 mm f/3.5-5.6 lens).

Dark bathroom--this is what it looked like to the eye. Aperture F/4.0, ISO800, Shutter 1/60.

Dark bathroom, brighter picture! Aperture F/4.0, ISO3200, Shutter 1/60.
So the only change I made was increasing the ISO from 800 to 3200.

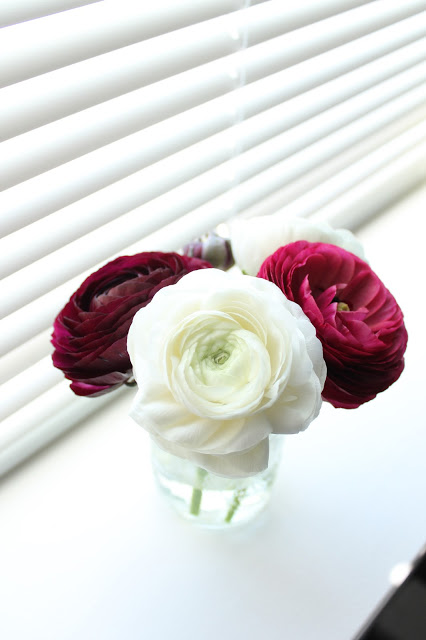
Close up of the flowers in the dark bathroom. F/4.5, ISO3200, Shutter 1/100.

I made the flowers just a little brighter by lowering the shutter speed. F/4.5, ISO3200, Shutter 1/60.

Objects in front of a bright backlit window, very over-exposed i.e. too bright!! F/4.0, ISO 800, Shutter 1/80.

Better exposure by increasing shutter speed! F/4.0, ISO 800, Shutter 1/250.

This is what the camera "thought" the exposure should be with an even faster shutter speed, but Christy said that if you have a bright backlight such as a window, you do have to overexpose the shot in order to make the subject bright enough. I think this is a bit too dark. F/4.0, ISO800, Shutter 1/500.

I lowered the ISO because the light was brighter for this close up, but it was too dark. F/4.0, ISO 400, Shutter 1/320.

Raised the ISO back up. Much better! F/4.0, ISO800, Shutter 1/320
 Even a bit brighter by slowing down the shutter. F/4.0, ISO400, Shutter 1/125.

Here's the room in front of the window. Way too dark! F/4.0, ISO400, Shutter 1/160.

I raised the ISO and lowered the shutter speed. Yay brightness! To get a sharper picture, I should have left the shutter speed higher (to protect against accidentally moving the camera while the shutter is open) raised the ISO even more to compensate for the higher/darker shutter speed, and maybe raised the f/number to lengthen the depth of field. F/4.0, ISO800, Shutter 1/30

Christy let me play with her awesome and huge 100 mm macro lens! (Ben calls the "ring in flowers or nature" a classic Christy shot, haha). I was also focusing manually with this lens. A little too dark for my taste but I love the moodiness. F/4.0, ISO400, Shutter 1/125.
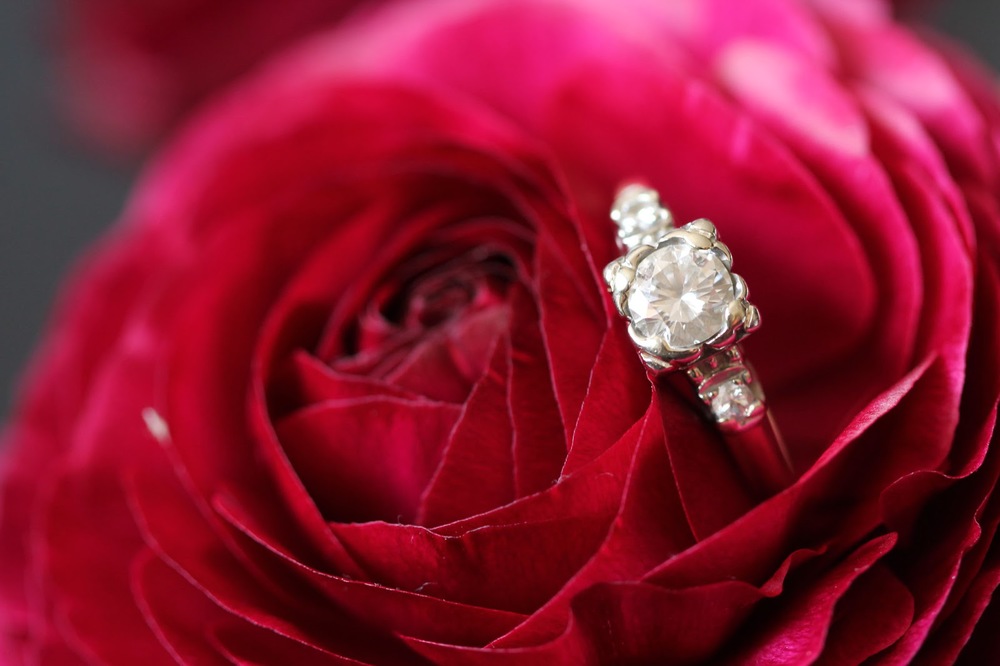
I brightened the shot by lowering the shutter speed since I was bracing my arms on the table and wasn't worried about camera shake. If I was holding the camera up, I would have tried raising the ISO too so I didn't have to make the shutter so slow. Gorgeous! I can't believe this is straight from the camera. I obviously need this lens.... F/4.0, ISO400, Shutter 1/25.

Christy turned the tables and let us practice photographing her for a change. Note the lower ISO number for outdoors, although I think I would have raised it a tiny bit to brighten the photo since we were in the shade: F/4.5, ISO100, Shutter 1/80.
Once I got home I had to keep testing out my new skills to make sure it wasn't just photography magic inside Christy's apartment that made us all so suddenly and mysteriously good with our cameras! Our apartment is extremely dim all the time since we only have one south facing window in a tiny breakfast nook, which is where I take all my Etsy photographs.
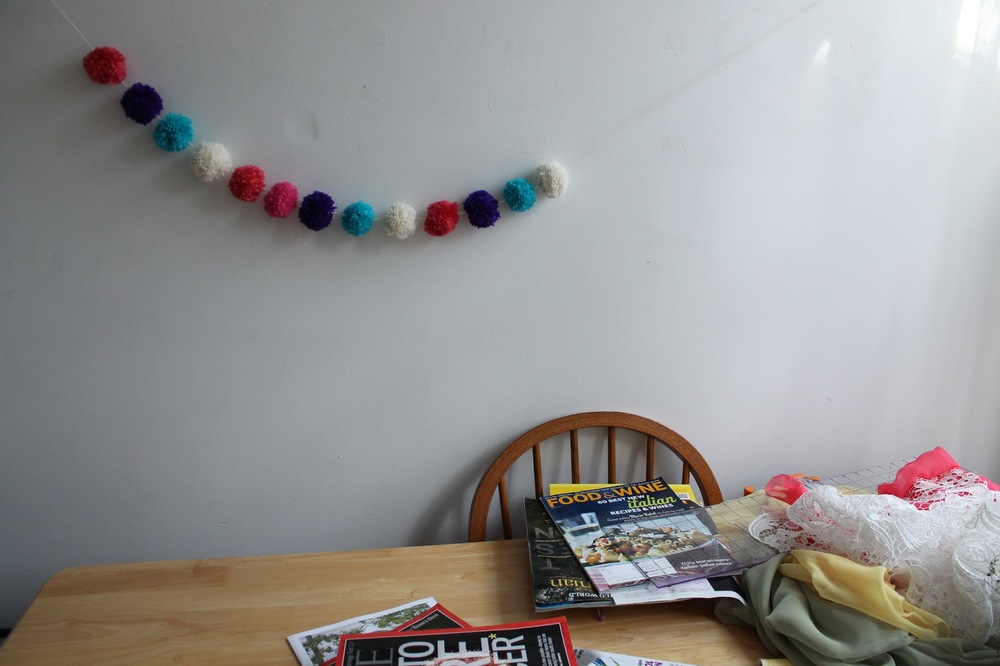
Here's what it actually looked like at 4 pm, minimal light left. Piles of magazines and fabric are typical.
F/4.0, ISO400, Shutter 1/125.

I like taking super bright and over-exposed product pictures for my shop, so I quadrupled the ISO. F/4.0, ISO1600, Shutter 1/100.

And here's a quick selfie I took for the shop! (Get the scarf here). F/4.0, ISO1600, Shutter 1/100.
Usually I have to edit the brightness and highlights on my product photos to get them as bright as I want, but I didn't have to adjust the exposure in this one at all! (This photo is straight from the camera, but for the listing photo I did minor touch ups and warmed the color temperature up to make the colors more true to life since the indirect late afternoon light here was blue-ish).
So there you have it! This is definitely not a "how to shoot in manual" guide since I am NOT professing to be even close to a photography expert, but if you've been attempting to play with manual I hope that I've helped you out a little bit!
And if you're an amateur or professional photographer in the Chicago area looking to expand your knowledge and camera skills I definitely recommend registering for one of Christy's workshops!