Anna Maria Locke

lately

AnnaComment


Lately I've been:

-Enjoying the sun we're getting! Despite still-freezing temperatures. Only one little corner of our apartment gets direct light, my sewing room/art studio/photography corner/kitchen table.

-Obsessed with lace. Adding lace trimmed floaty infinity scarves to the shop, keep an eye out for more colors and patterns this week!


-Doing this workout, the best/hardest full body routine I've found on YouTube.

-Reading The Art of Fielding for book club. Highly recommend.

-Waiting to hear back about a job interview...eeep.


-Looking forward to Ben's spring break in two weeks! I've barely seen him lately. Teachers work way too much.


What have you been up to this week?

DIY lace trimmed wedding veil

Anna7 Comments

This page may contain affiliate links. As an Amazon associate I earn from qualifying purchases.

(photo by Christy Tyler Photography)

As you can see by the colors of the leaves in that photo, this week's crafty tutorial is looooong overdue: my DIY lace trimmed veil!

Veils are ridiculously overpriced at bridal boutiques considering that tulle is less than $2 a yard, so I knew from the beginning of wedding planning that I wanted to make my own. After doing a bit of research, I discovered that it's easier than it looks!

The first thing you need to do is choose a style and length. I knew I wanted a single layer (no "blusher" aka the part that goes over your face), fingertip length, and minimal poof-factor.

a step by step tutorial to make your own lace trimmed wedding veil with links to supplies needed

How to make your own heirloom wedding veil

Supplies I used:

DIY Lace Trimmed Veil

Here's a close up of the gorgeous lace I got. I lucked out with an amazing per-yard deal, so of course I bought the entire roll. Still deciding what to do with the leftovers...

Sidenote: I was afraid the lace would clash with my dress since the lace is extremely yellowed ivory, my dress was a different ivory, and the lace trim on the dress was white, but it looked fine! You don't have to matchy-match everything.

(That may have sounded type-A but just wait until you're planning a wedding. The subtle differences between white and ivory take on SUCH MEANING and it's scary.)

Step 1:

Cut your tulle in the size and shape you want. 

This was the most difficult step for me, because I accidentally bought WAY too much tulle.

I ended up with a half circle shape, 60" along the straight edge by 45" to the widest point (the dimensions are labeled in white in the picture, kind of camouflaged by my floral rug). To cut the shape, the tulle was folded along the 45" line and I cut an arc through the double layers to make sure both sides were even. Then I shaped the top and sides until the curves lay the way I wanted when I draped the tulle from my head.

-If you want a double layered veil, you'll cut a circle or oval shape and sew your comb in the center.

-Fintertip veils are 40-45" long.

-Tulle is cheap, so don't be afraid to do some trial-and-error guessing! Cut a shape, drape it over your head, trim if it's not laying in the right way. This one was my second attempt!

Step 2:

With your tulle laying on a flat surface such as a clean floor, pin your lace around the edges.

You might have to cut slits or darts in the lace to curve it around the corners.

Step 3:

Thread your needle and sew the lace on!

In the above picture you can see that I lined the lace up so that the edge of the tulle came almost to the bottom of the lace trim. I didn't use any fancy stitch, just loosely tacked the lace on. And yes, it takes a long time...turn on a movie!

Originally I was going to sew on the top AND bottom of the trim for extra stability but let's face it, that would have been way too much effort. You can apparently buy clear thread so your stitches don't show at all, but I was sick of buying just "one more thing" for the wedding. White thread isn't noticeable, even on ivory lace.

Step 4:

Gather the top of your veil by sewing a strip of large straight stitches in the middle of the flat edge

(see awesome illustrated diagram above Step 1 for where the comb goes)

I gathered about a 10" strip because I wanted my veil to lay flat. If you want a poofy veil, gather more of the edge and you can even cut it wider than 60".

You want the length of the gather to equal the width of your comb.

Step 5:

Sew your comb onto the gathered edge.

Orient the veil so that the RIGHT side (side with the lace edge) is FACING the inner curved side of the comb. (So in the above picture, the right side is laying face down on the surface, spread out behind the comb).

This way, you can flip the veil over the comb so the veil covers the sewn part before you stick it in your hair, and the lace will be facing outwards. Kind of confusing, but it makes sense when you're playing with it.

To sew on the comb, I just wrapped the thread around and around to make sure it was secured.

And that's it!

Here's the final product right after I finished it. Notice how the bottom part (45" from comb to bottom) actually goes BELOW my fingertips. Also, the lace was pretty heavy and dragged the veil down.

If you're going for the poofy ethereal look, you should use more layers of tulle, gather more of it, and edge it with ribbon, lighter weight lace (like Chantilly) or save yourself some effort and don't edge it at all! Tulle won't fray.

So if you're looking for ways to trim costs while wedding planning, I highly recommend trying to make your own veil or headpiece. It's relatively quick as far as DIY projects go (I made mine in one afternoon) and no one will be able to tell if it's not perfect! Plus you will have created a beautiful family heirloom that can be passed down to future brides!

I'll close this post with a few more action shots of our wedding. Wearing a veil definitely made me feel like a little girl playing dress-up, it was kind of surreal and weird.

Also, looking at these photos makes me really miss seeing leaves on the trees...

(c/o Christy Tyler Photography)

Do you think you'd attempt making your own veil?

indoor spring: 2013 Chicago Flower and Garden Show

AnnaComment

Before I share more pretty flower pictures, I'd like to do my blogger duty of acknowledging that Google Reader is going away. I've been a daily GR user since 2009 and I just can't believe them when they say that "usage is declining"! I'm usually supportive of Google's world takeover mission but I don't like how they're manipulating everyone into using Google+. 

Well, anyway, if you're a Google Reader user you've probably found an alternative by now. I've started using Feedly and I love it so far. It takes a little bit longer to load on my computer sometimes but I think it's actually better than GR in that it's easier to organize your blogs and read one at a time.

Another popular option (especially for fellow bloggers) seems to be Bloglovin'.
If you're a Bloglovin fan you can follow me by clicking the link below!


Ok, on to the post!


This weekend Ben and I ventured downtown to check out the 2013 
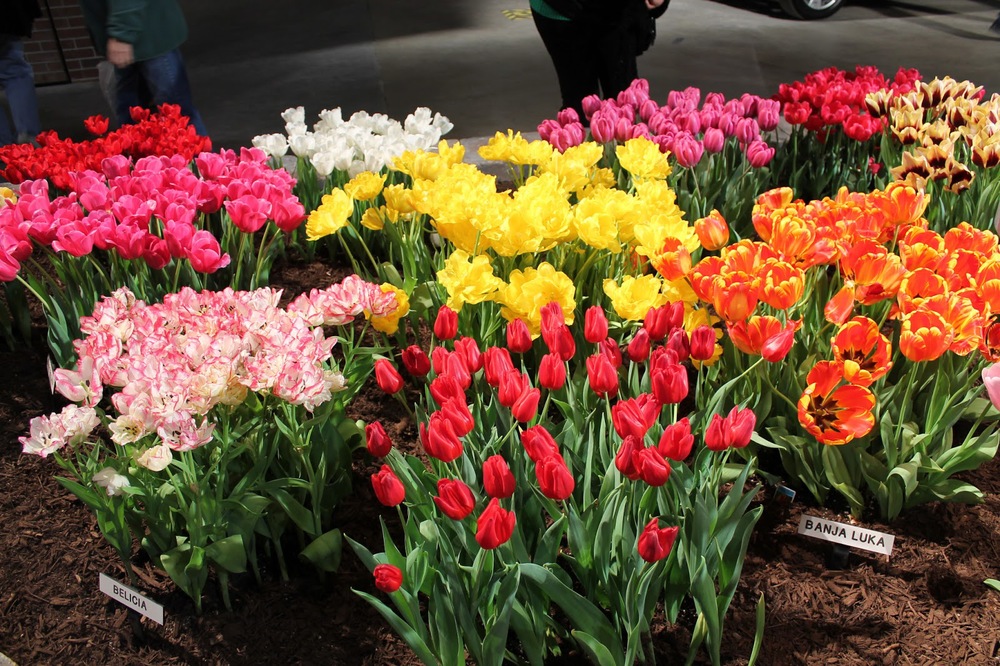
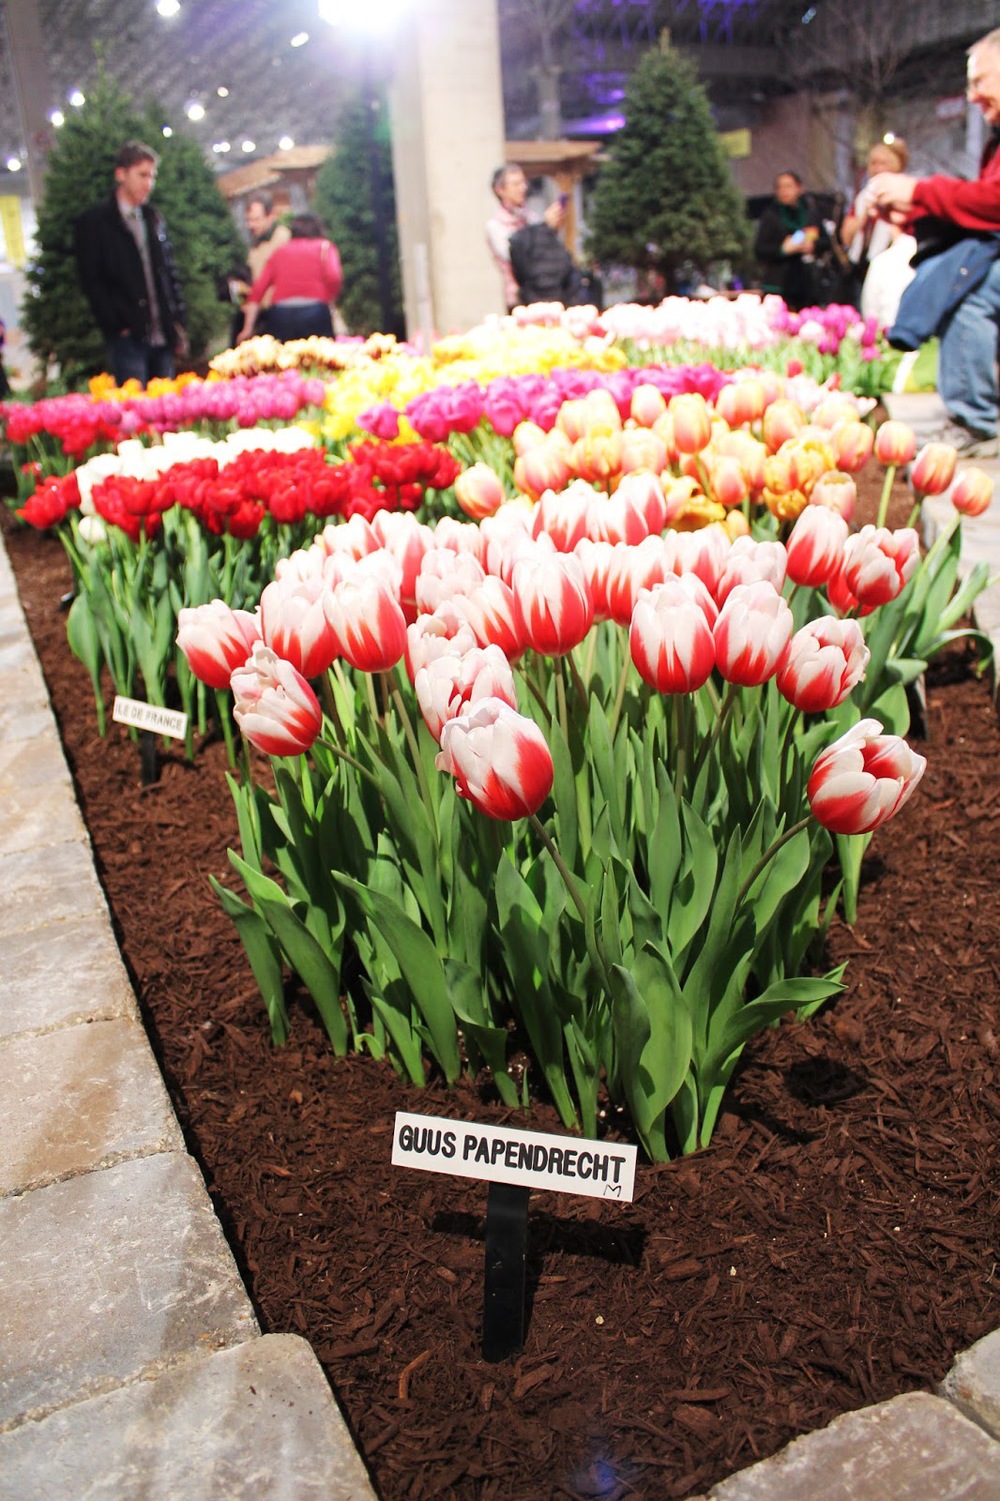
Chicago Flower & Garden Show at Navy Pier. My uncle's bulb company Doornbosch Bros. is responsible for the spectacular tulip displays and since we now live in the city we had to take the opportunity to visit him and my cousins at their bulb booth and experience the gorgeous colors!
 

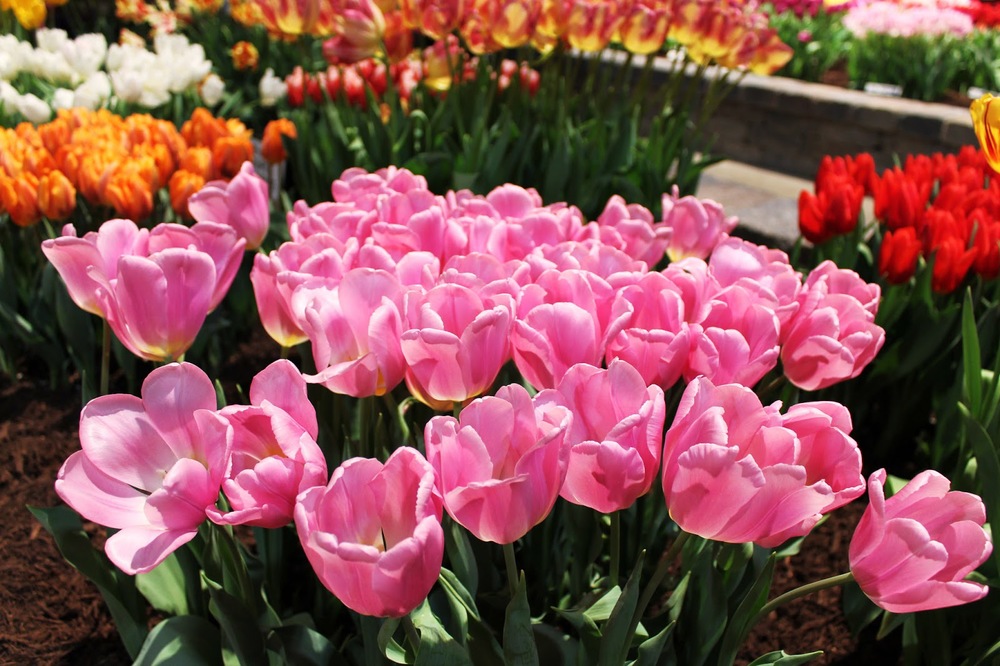
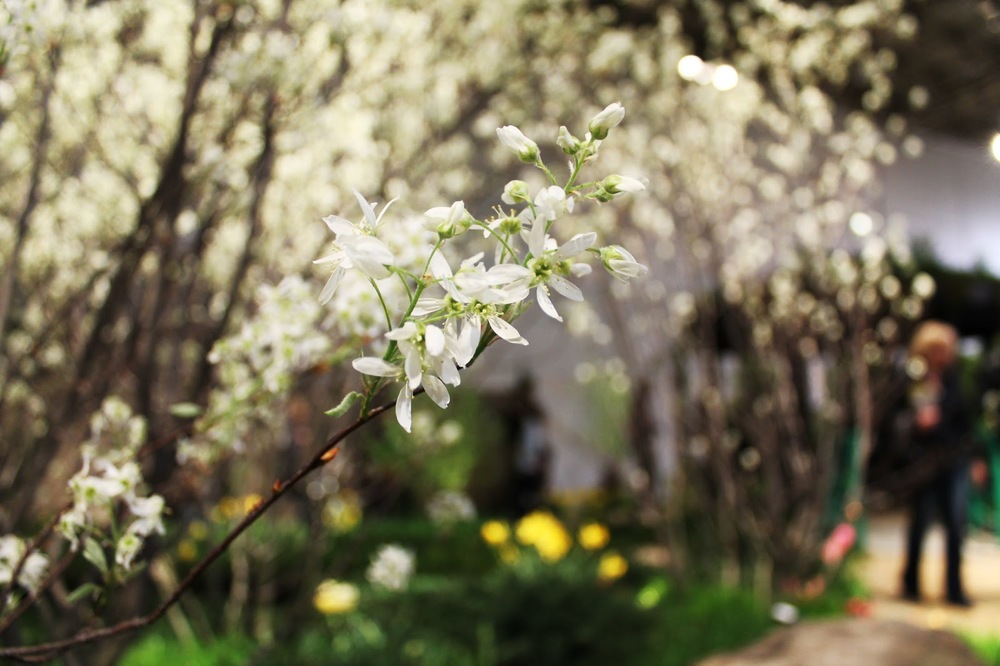
Since it seems like we are stuck in a perpetual Narnia-style winter here in Chicago, it was SO refreshing to get to see some flowers blooming. If you've read my blog for any stretch of time you know that I love taking photographs of flowers, so I left Ben on his own to wander around the exhibition hall while I spent a good amount of time geeking out and taking tulip portraits!


Each of the 8,000 bulbs were individually planted in a little pot last fall, left in a cooler to simulate winter, "forced" to grow and bloom in a greenhouse last month, and then painstakingly planted in these raised beds!


The hundreds of fellow spring-starved people at the show were all magnetically drawn to the spectacular tulip displays. 


It was an interesting challenge to photograph flowers under harsh spotlights!


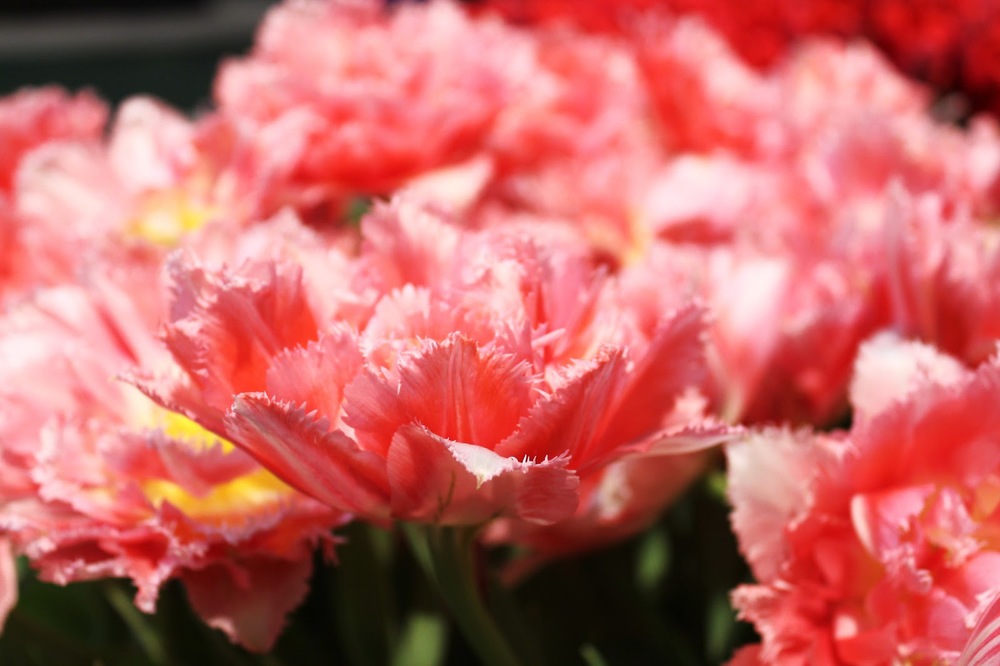
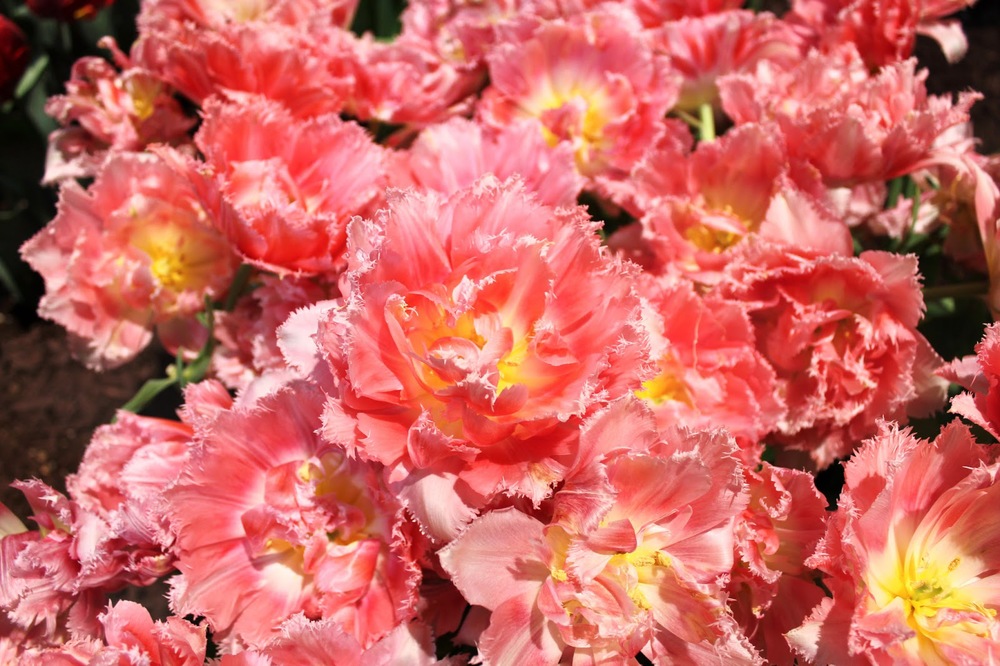
Pink tulips are my favorite, can you tell?


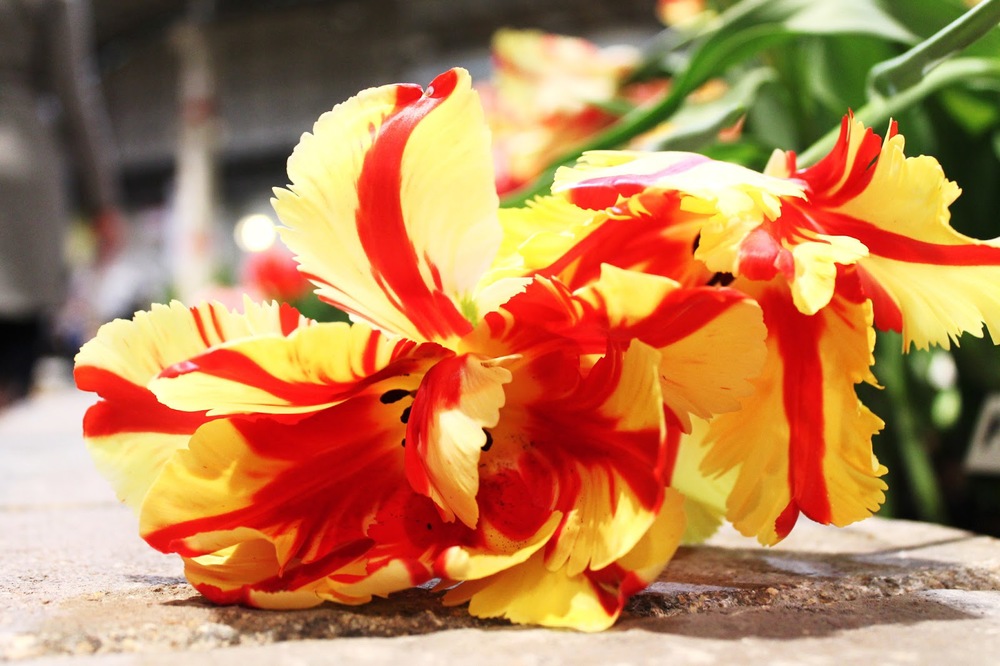
The tulips with feathered stripes are called Rembrandt tulips and were highly prized back in the Tulipomania days of the 1600's. Originally the color variations were caused by a virus but growers have developed a way to mimic the coloring patterns in healthy bulbs.


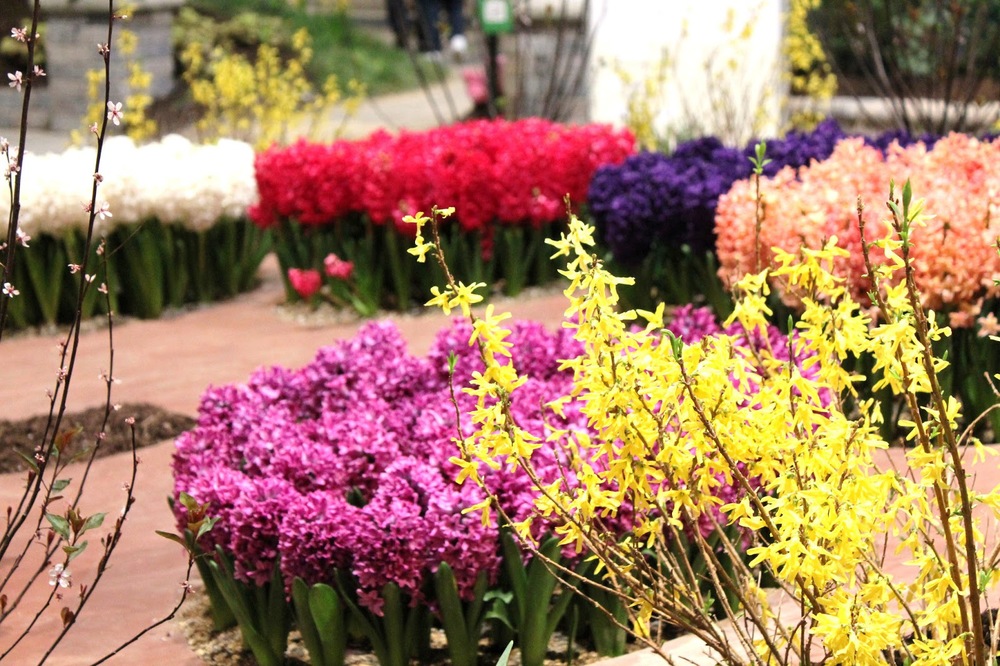
I like hyacinths better than tulips because they smell so good!


If you're interested in planting tulips in your yard, look for large bulbs from an authentic Dutch supplier. Planting season for tulips and other early spring flowers (daffodils, hyacinths, crocus) is in the late fall (October/early Nov) before the first frost. Plant bulbs in clusters of at least 12 for the most dramatic effect! You can plant summer flowers right now. Here are some more planting tips.

I hope you enjoyed this glimpse of spring! Maybe someday we'll see some flowers growing outdoors too...I say as it actually snows outside.

Do you have a favorite flower? 
(Tulips are nice but I really love big fluffy summer blooms like peonies and dahlias the best).

Have you ever tried planting bulbs?